do you have a banjo we can help with?
Gropp Perl Gold
Project: Renovation of Perl-Gold banjo, early 1950s, made by the Gropp family in East Germany.
Issues:
Pot splitting. It is ungluing at the mortise and tenon joints which hold the two pot halves together. There is a little fracturing around the joints. Held together by rusty iron band to brace the two halves.
Perch pole has been shortened by about 4mm to position the iron brace.
Needs new tuners
Needs new head
Needs new pressure plate on perch pole
Needs tailpiece attachment bolt
Generally dirty and many parts rusty
The pie plate resonator is missing. Shame, but it’s going to be an Irish tuned banjo, and open back is often preferred.
Good points:
It has 28 rim hooks!
The neck is straight and well-made 5 laminate. It is extensively inlaid with pearloid edge binding.
The headstock has a laminated front cover.
The frets look good.
All these are signs that this was produced to be a good mid to high market working instrument.
Final value at least £300 and now sold!
Reconstruction Gallery
Found on pub wall
Damage was extensiveDamaged and Rusty
Pot splitting. It is ungluing at the mortise and tenon joints which hold the two pot halves together. There is a little fracturing around the joints. Held together by rusty iron band to brace the two halves. Perch pole has been shortened by about 4mm to position the iron brace.
Back
Joints falling apartBefore Reconstruction
Perch pole has been shortened by about 4mm to position the iron brace. Needs new pressure plate on perch pole
Needs tailpiece attachment bolt. Generally dirty and many parts rusty.
Old Tuners
Before Reconstruction
Needs new tuners and new head. The pie plate resonator is missing. Shame, but it’s going to be an Irish tuned banjo, and open back is often preferred.
Pot Damage
Before Reconstruction
Checking out the damage to the pot. I’m pretty sure it’s repairable.
Pot Split
Before Reconstruction
Pot split with isopropyl alcohol and heat ready for joint sanding.
Metal parts treated and cleaned with a mixture of rust remover, white spirit and alcohol.
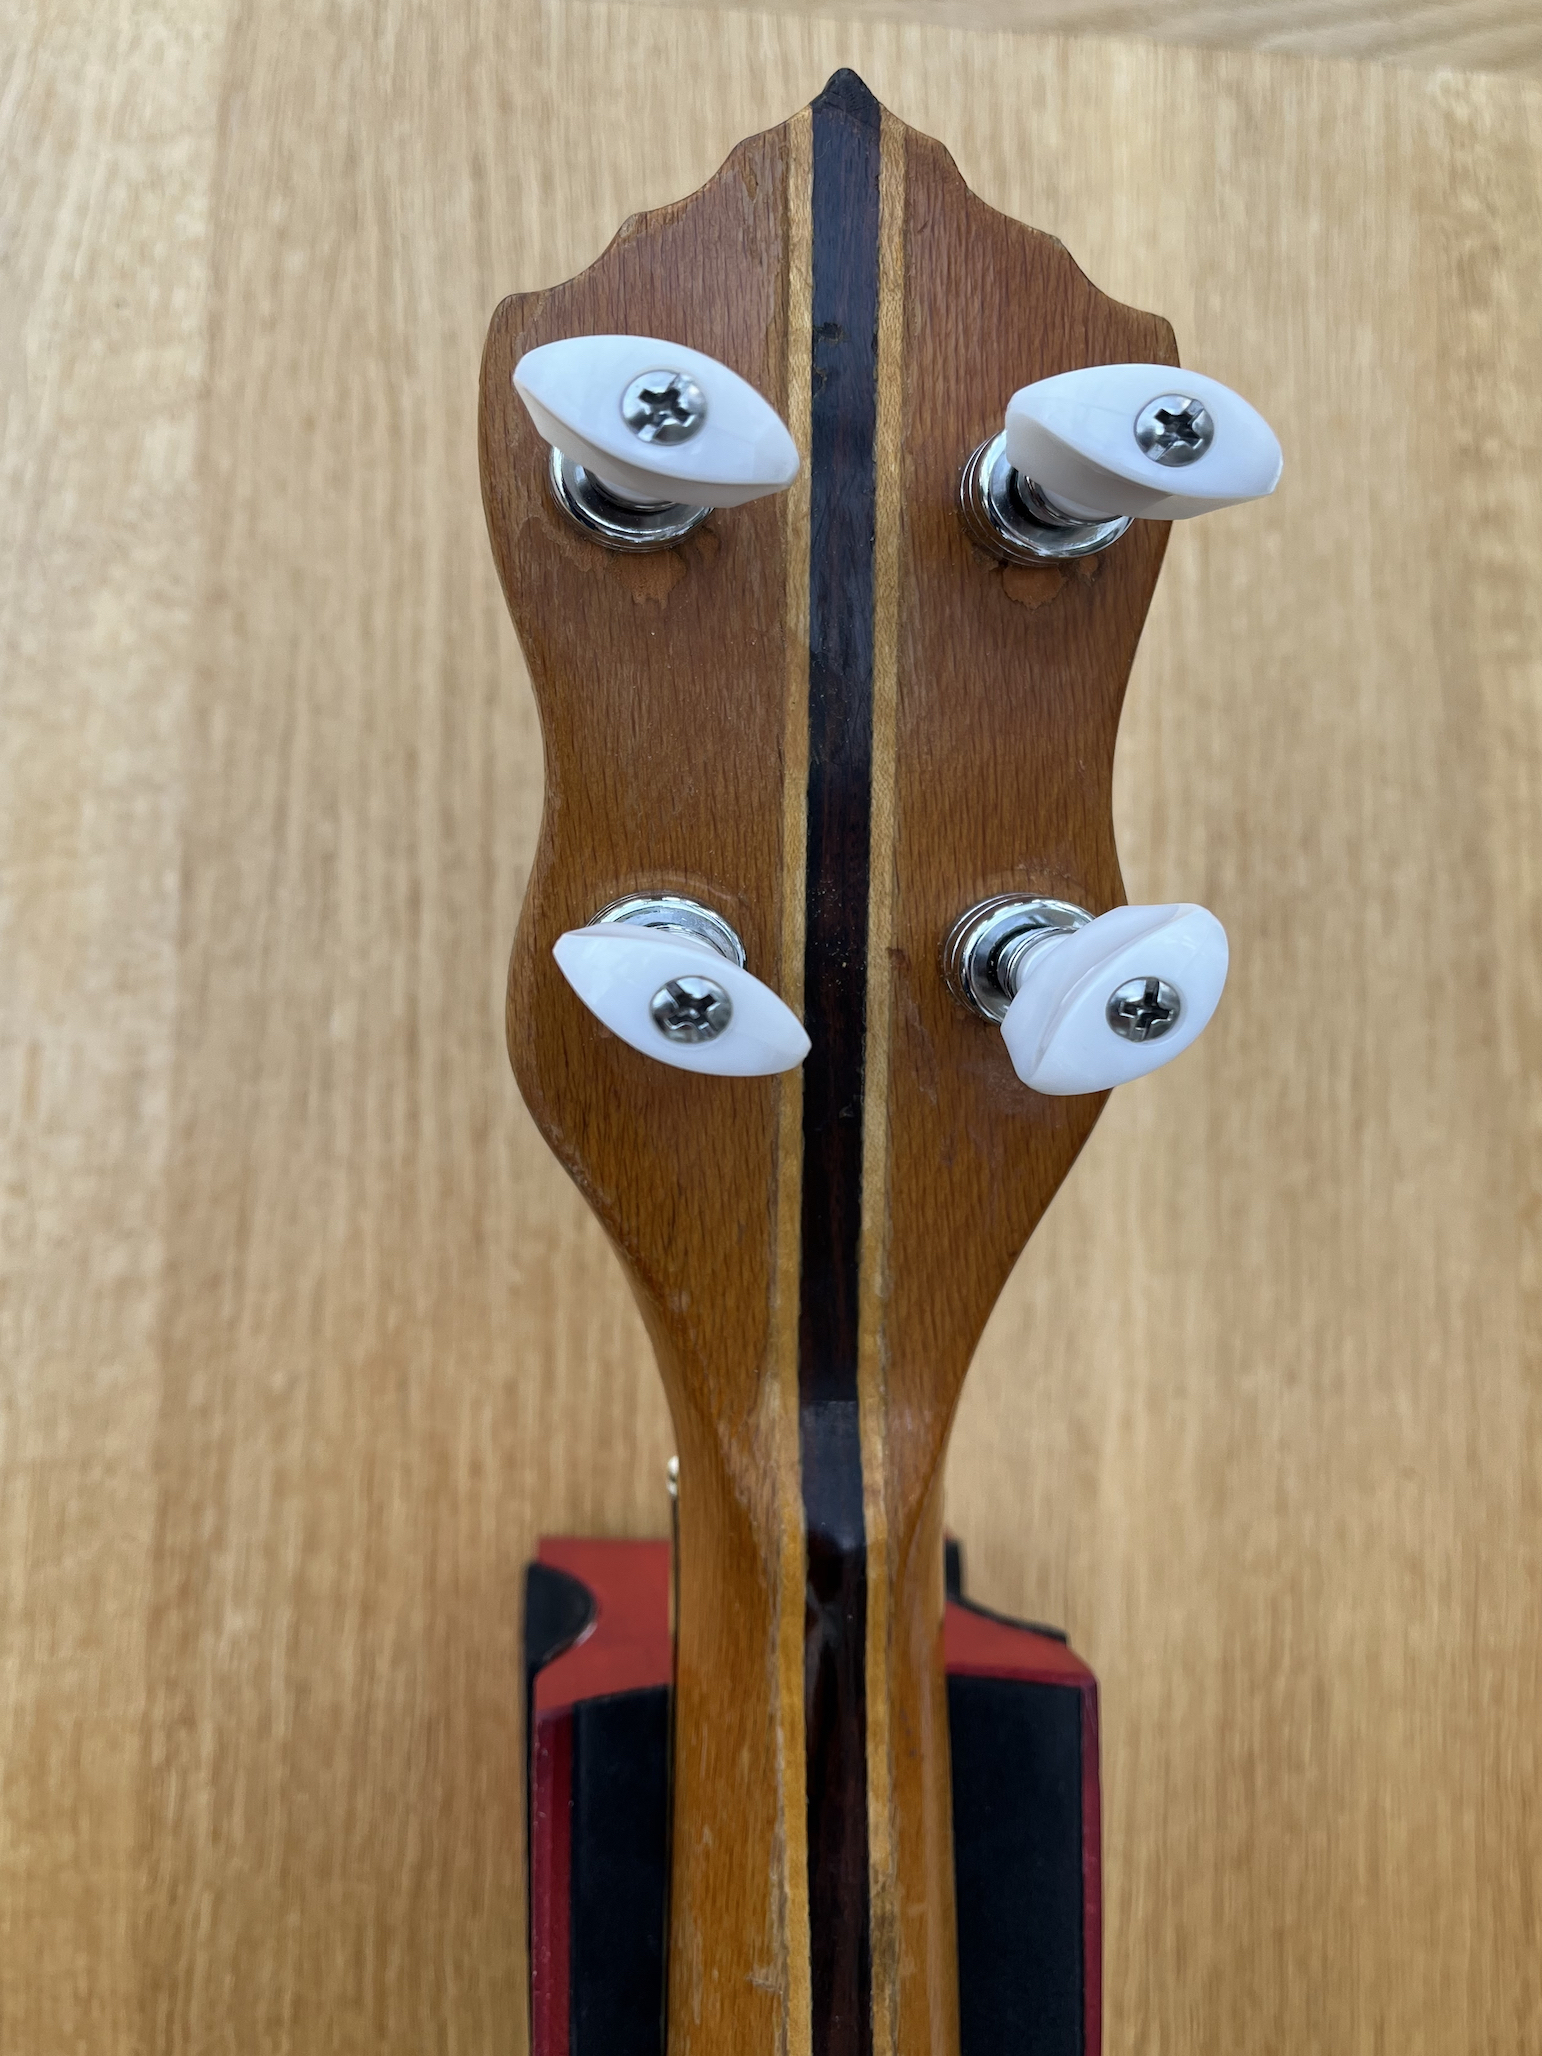
Leader Tuners
From Eagle MusicNew Leader 4:1 ratio Planetary Tuners from Eagle Music, the old sort are pictured. I had to gently ream the holes from 7 mm to 10 mm. I reamed by hand using very sharp drill bits, 8 / 9 / 10mm in turn, with a small vice grip as a horizontal handle. It was easier than I expected and I was pleased that the cuts were clean.
Tension Ring
All Cleaned
Tension Ring needed a clean but it came up nicely!
Pot Sanded
Ready for Next Stage
Pot sanded and ready to glue.
Joints Filled
Preparing for Varnish
Joints now solid and filled. Today is sanding the joints, filler and general pot rim to enable varnishing. The pot is made of something like beech, with a fine veneer of mahogany on the outside of the rim
Dowel Rod
Pressure Plate
I also made a pressure plate for the dowel rod/ neck tightening bolts out of a piece of aluminium.
Varnishing
Pressure Plate
I’ve chosen to use nitrocellulose clear gloss from Northwest Guitars. It needs to be well diluted (50/50) with Rustins Cellulose Thinners from the same source. A lint-free rag which worked perfectly. Latex gloves are essential. Important to go with the grain on the mahogany veneer, which has come up quite nicely.
Still a bit of work to do on the inside of the rim. The aim was for a working instrument, so you have to call a halt sometime. Just awaiting delivery of the 10 7/8 Remo head then reassembly!
Buffing Varnish
Using Dremel Pads
To buff up the varnish I used an electric screwdriver, a Dremel buffing pad, (the Dremel would have turned too fast) and some jewellers rouge. Worked a treat!
Tension Hooks
Reassemble
Starting reassembly, tension hook shoes. The electric screwdriver was a godsend for mounting these, finished off with a manual screwdriver for each bolt, and using a tension hook as a tommy bar.
Tension Hook Shoes
Reassembly
Don’t need to get them very tight yet, as all the pull on the shoe is at right angles. I’ll tighten them fully when the head is going on.
Tone Ring
Copper Rings Fitted
We all know the physics of a tone ring is to stop the head vibrations dissipating into the body. That’s why loud banjos have a massive tone ring. This banjo only had a thin aluminium strip around the top of the pot to give a faint archtop effect. I can’t fit a thick tone ring because the floating fretboard overhang only allows a 5mm gap. So I’ve gone back to 1920’s technology and popped a pair of heavy copper rings around the top of the pot. Provided the head fits over, that should increase the volume.
Preparing Ring
Taped!
I taped the rings together. I will remove the tape as the head goes on then the pressure of the head will keep everything in place.
Attaching Tension Hooks to Head
Work Begins
At last the head has arrived and I can start attaching the tension hooks. This has to be done before the neck goes on with this model because of the floating fretboard overhang.
Using Torque Gauge
Even Tightness
I know some will question my use of a torque gauge, Some clever luthiers just tighten the head till it sounds “right”.
All I can say is, I’m not that clever. What I need is even tightness of bolts, and, yes, I know that one bolt may bind more than another, but in many years of doing this I’ve found that it’s a lot better than guessing. Of course I tighten across the head, “side to side”, not “round the edge”. The classic way to tighten a head, of course, is to tighten it till it just splits, then back it off 1/8 of a turn!
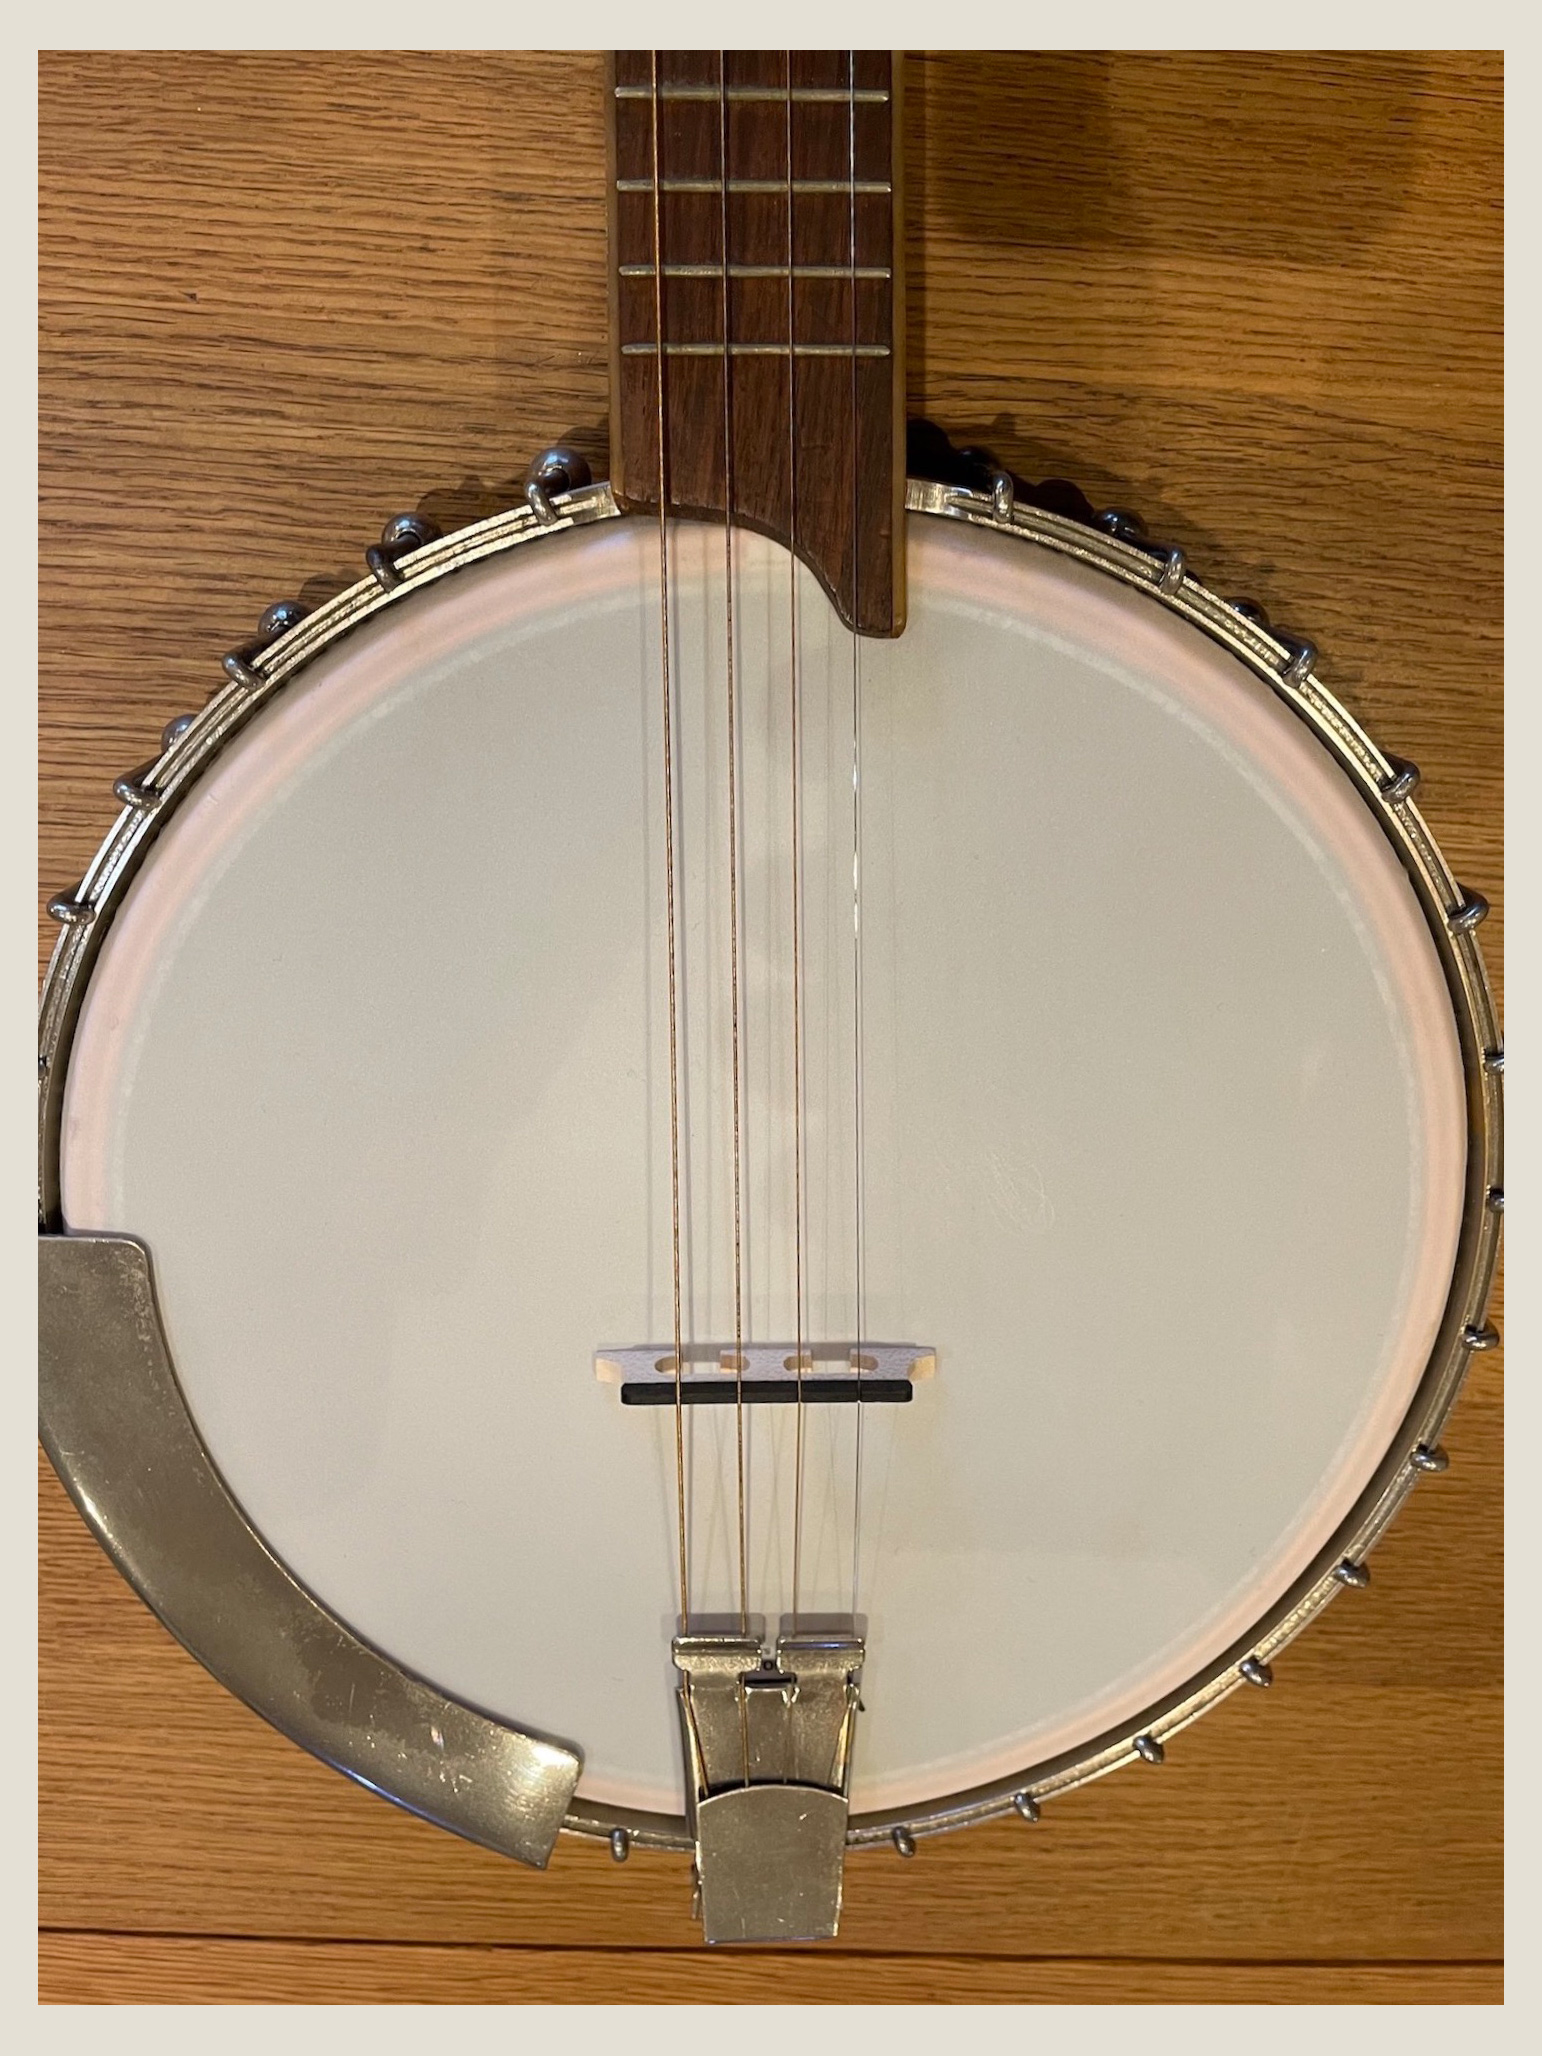
Head Completed
Reassembled
Now all reassembled. Took it out for its first session and although it felt a bit long as a 23” scale length / 19 fret (I’m used to 20.5” / 17 fret) it was lovely to play because the action was so low and the volume so good that neither hand had to work very hard.
Reassembled
Plays Easily
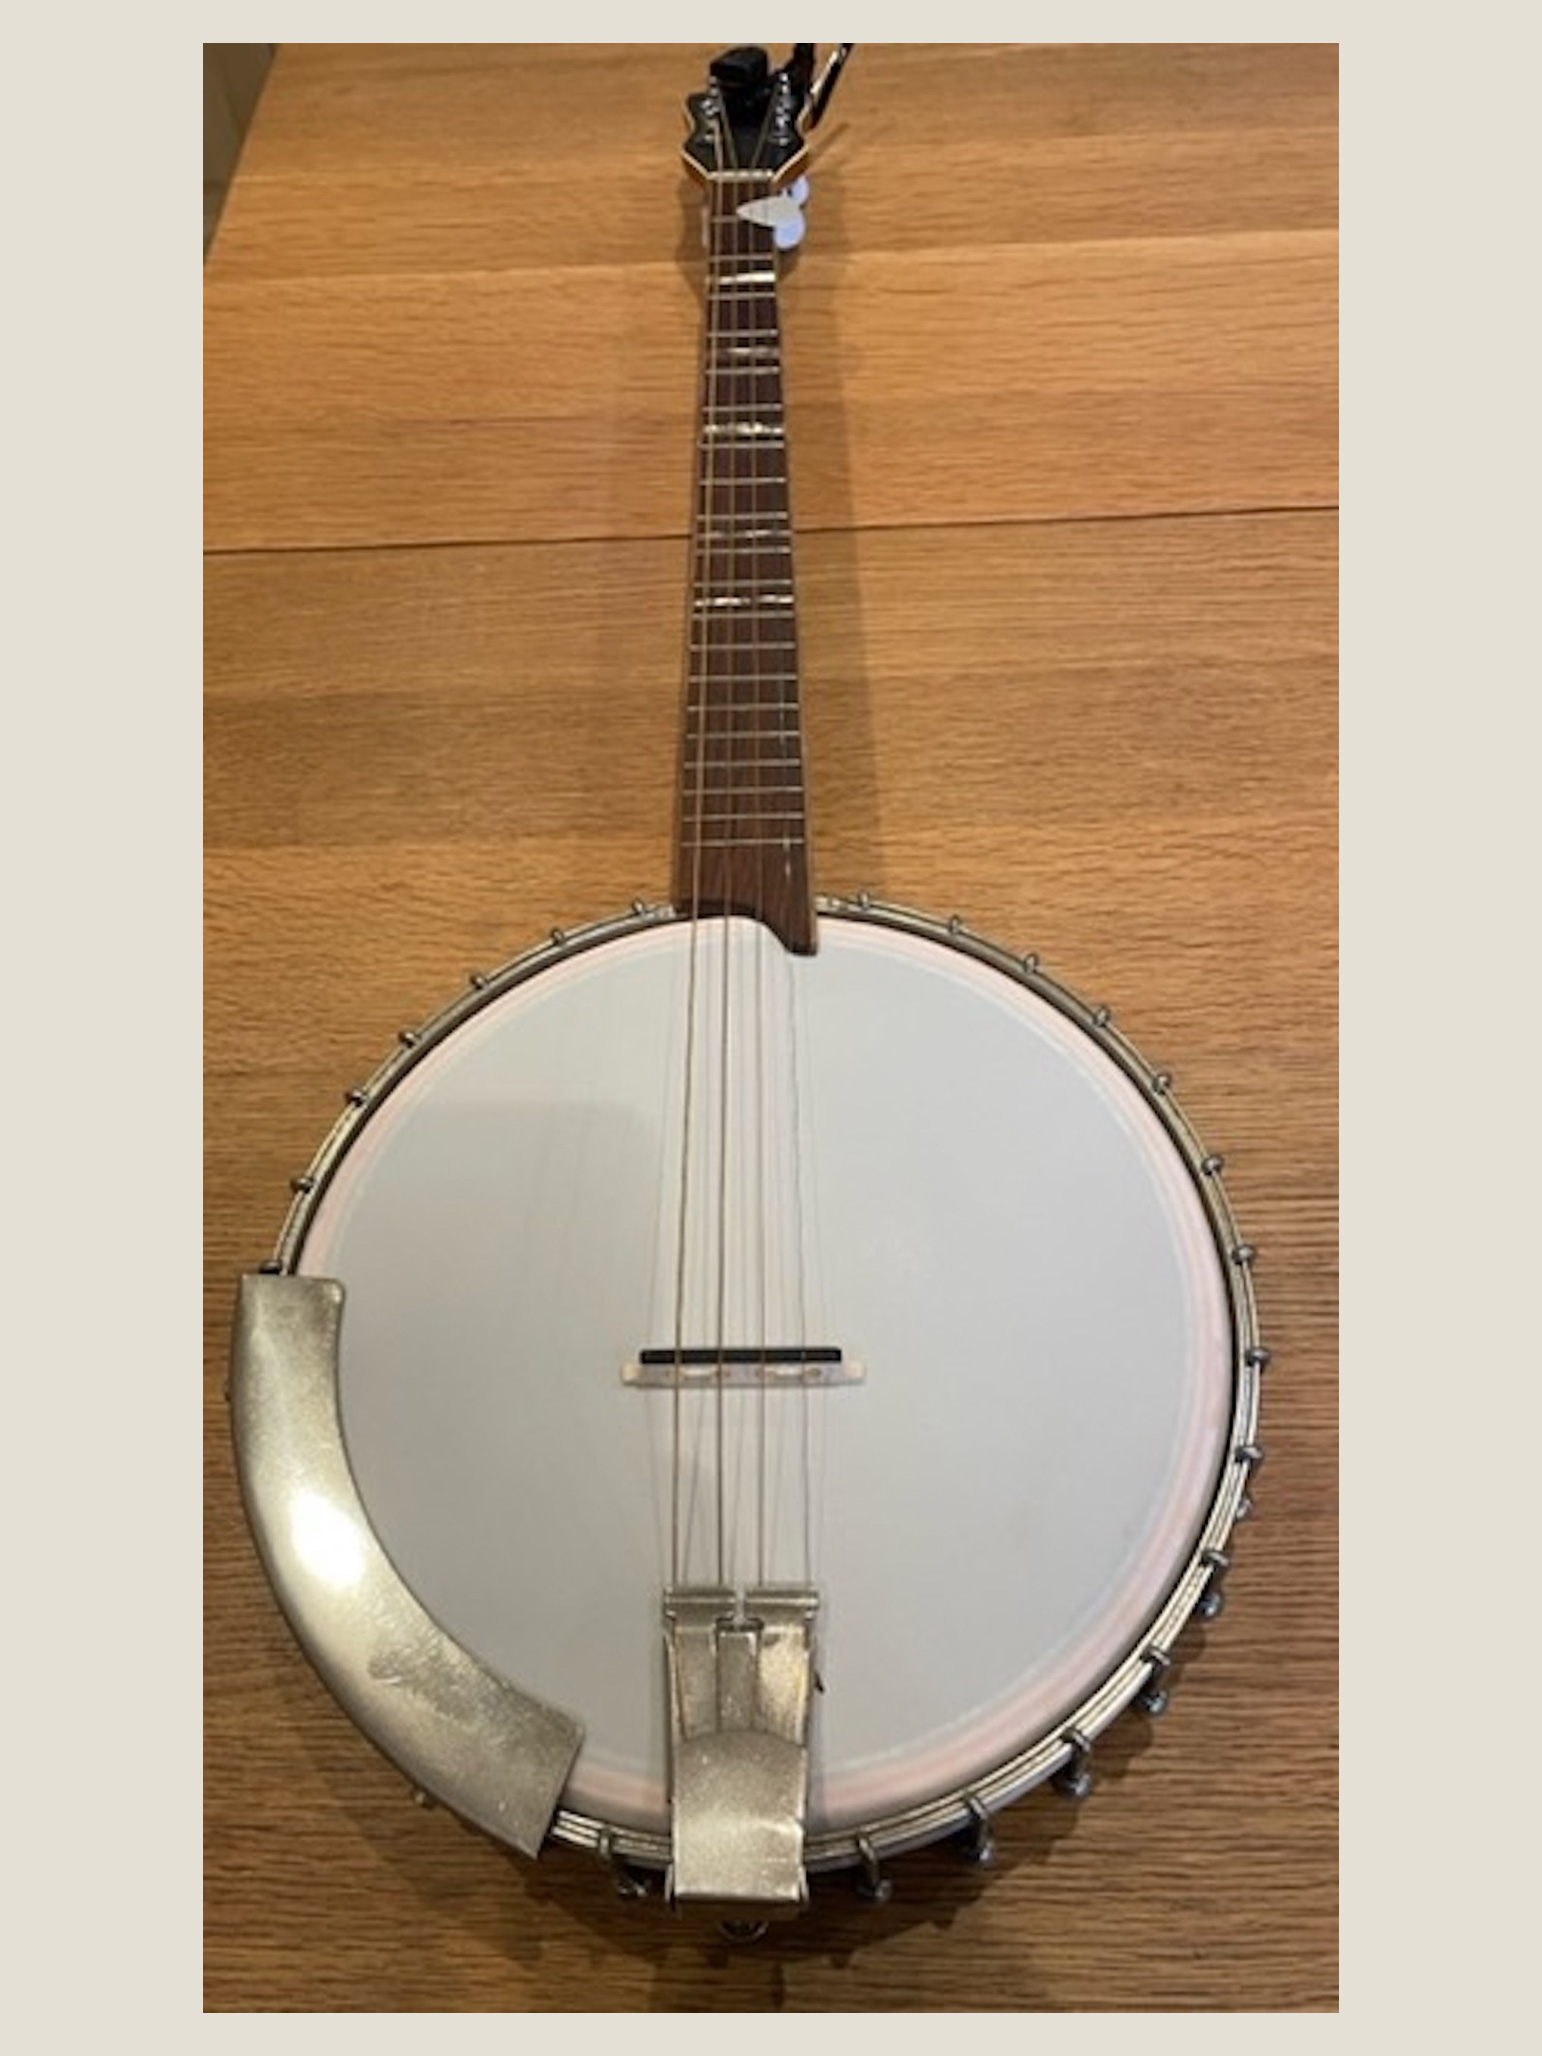
Here are the final pics. I valued the initial condition of this banjo at nothing – indeed its previous owner had it given to him to hang on the wall of a pub. It now plays as easily as my vintage Bacon Blue Ribbon and my Clareen Elite and sounds nearly as good.
Final Photos